
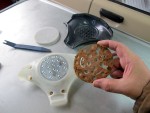
The heat gun is one of those tools like the five pound sledgehammer which reveals its many uses as time passes. The idea is simple if not slightly dangerous. Like a hopped up hair dryer, the heat gun focuses superheated air in whichever direction it is pointed. This makes the heat gun great for softening up and removing everything from old vinyl graphics to unwanted paint. The … [Read more...]
Horn Switch Repair
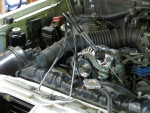
Daily driving classic cars and trucks comes with benefits and pitfalls. 200,000 miles combined with 25 years can have deleterious effects on the materials originally used to build even the finest automobiles. One of the more vexing failures is when a horn stops working when you lay on the button or worse - when the horn sounds off all on its own. And that's just what … [Read more...]
Tool of the Week: Mechanic Stool
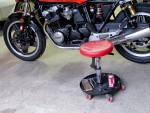
Sitting on a stool is a famously popular activity the world over. Add some slakey beverages, put the stool at a bar, and folks will part with substantial sums of money and time. If you're reading this chances are your stool of choice is out in the garage, probably has some wheels on it, and most certainly has a wrench or two sitting on the handy built-in tray. Such is the dual … [Read more...]
Tool of the Week: Mitsubishi ECI Checker
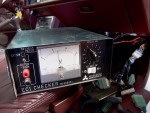
One of the great laments of the mothballs-in-their-pants set of the vintage car world is the demise of carburetors. These newfangled kids don't know how to adjust a carburetor with a shoelace, crumpled up Chesterfield, and piece of elbow macaroni. Fuel injection is all part of a larger Trilateral Commission conspiracy to keep track of our special thoughts. And so on. Don't get … [Read more...]
Tool of the Week: Mechanic’s Stethoscope
The biggest trick to fixing something broken is diagnosis, or identifying what to fix in the first place. When it comes to vexing mechanical problems there is probably no greater source of mystery than car noises. Pinpointing the source of the sound in question is the key to victory, and there is no better tool for this task than the simple mechanic's stethoscope. For just a … [Read more...]