
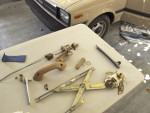
Going by the book while driving and repairing fine vintage automobiles usually means running into the point where the manual says use Special Service Tool X-5745 to remove a bearing, or SST set 09612-10091 and a block of wood to overhaul the steering gear. Many of these tools have long since been tossed into the dumpster of discontinued parts. Lack of availability can result in … [Read more...]
Replace Window Regulator
Modern and more luxurious cars than the 1982 Toyota Starlet have equally modern conveniences such as self-parking guidance systems and electrical windows. The Starlet has a small high-impact plastic crank that is turned to open and close the window. The plastic crank is attached to a simple and durable device known as the window regulator. The window is in turn attached to one … [Read more...]
Tool of the Week: Nut and Bolt Gauge

In a time before nuts and bolts were packaged into useless plastic bags in never correct quantities, gathering fasteners was as easy as heading down to your auto parts or hardware store and just asking for a dozen M8 45 millimeter exhaust studs with a 1.25 thread pitch and matching copper pinch nuts. While there are some auto parts joints and fastener suppliers that still … [Read more...]
Five Tips for DIY Automobile Repair

You are one of the intrepid few that revel in the satisfaction of fixing automobiles yourself. You enjoy building things no matter the cost or even unfortunate result. While that unintentionally cubist home made book shelf in the living room may lean more towards Braque than Picasso, it represents a valuable lesson learned for the next square and far more rectangular … [Read more...]
Tool of the Week: Battery Charger
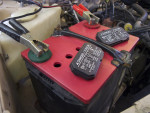
Dividing the number of times a tool is used into its own utility makes the battery charger one of the best long-term investments for the absent minded and forward thinker alike. Since the basic design and chemistry of a lead-acid automobile battery haven't changed all that much since the days of Charles F. Kettering, the old battery charger is a tool that is often used for many … [Read more...]